Chicken and Mushroom Lattice Pie

I am looking for a crowd favourite as we are hosting some friends for dinner in June …. a dish that can be prepared in advance, placed into the oven and then served up to make friends happy.

Pies are always a great “make ahead” idea as you can put everything together earlier in the day and just bake on demand!

This recipe was in the Delicious Magazine (no idea which issue but must have been 2019) in an article all about pies!

I confess that I didn’t make my own pastry – but rather resorted to shop bought … and also only put the pastry on top of the pie as opposed to top & bottom. Something I would definitely rectify in the future. As this was a “test” recipe, I halved the quantities somewhat and it still worked quite well. I also omitted the horseradish as I am not a fan.

The pie is gorgeous and I adored it! While HIM preferred my sweeter Chicken & Leek pot pie filling, he still said it was a good one! A definite make again!

CHICKEN AND MUSHROOM LATTICE PIE

500g mushrooms (thinly sliced)
2-3 pieces of cooked chicken (Shredded) – I used breasts
1 Tablespoon sea salt flakes
50g plain flour
100ml Port
1/2 teaspoon grated nutmeg
1 Tablespoon chopped parsley
60g Parmesan (grated)
1 Tablespoon soured cream
2 teaspoons mustard
1 Tablespoon lemon juice
240-280g shop bought pastry

  • In a large mixing bowl, place the sliced mushrooms, chicken and sea salt. Leave for 10minutes
  • Add the flour and mix to coat
  • Add the port, parmesan, mustard and soured cream and mix again
  • Place inside a greased pie dish
  • Cut your pastry into long strips and create a lattice affect as a topping
  • Bake at 200C for 1 hour (in the last 15minutes, I brush the pastry with an egg to give is some more colour)

Chocolate and Banana Galette

One of the positives of being on maternity leave is that there are moments of calm where baking and trying new recipes is actually possible, but only because you are generally housebound and under the clock with regards to feeding the newborn… so no Instagram-worthy images of new (elegant and stylish) mom holding a coffee cup while pushing a gorgeous looking child in a stroller… or at least not for me.

But I digress…

I was scrolling through Instagram (one handed) while feeding little one with the other – when I saw the yummy looking chocolate and banana galette that Delicious Magazine posted… I was drooling…. so the first moment that I had, I was in the kitchen.


The galette base was a bit difficult to work with as the dough was a bit wet… but at the end of the process, it made it crumble-worthy shortbread type base that was truly scrumptious!

And the combination of dark chocolate and banana is a match made in heaven! I omitted the hazelnuts as I didn’t have any – and it was still great!

A definite make again!

Chocolate and Banana Galette

200g flour
100g sugar
Pinch of salt
125g cold butter (chopped)
2 egg yolks, lightly beaten
2 Tablespoons runny honey
100g dark chocolate (roughly chopped)
3 ripe bananas (sliced)
1-2 Tablespoons light brown sugar

  • Using a fork, whisk together the flour, sugar and salt in a bowl to combine.
  • Add butter to create a breadcrumb consistency.
  • Add the egg yolks one at a time, to make a shaggy dough
  • Tip on a workspace to knead briefly and shape into a disc.
  • Wrap in plastic wrap and chill fro 30min
  • Warm the honey in small pan and set aside
  • Roll our dough between 2 pieces of parchment baking paper
  • Mark out a ~5cm border around the edge and scatter the chopped chocolate evenly in the center, topped with slices of banana.
  • Brush the bananas with the warmed honey and sprinkle the sugar on top
  • Fold the border inwards, pleating and gently pressing to form an edge as you go
  • Place on a pre-heated baking tray and bake for 30min at 180C

Baked Orange Ricotta Cheese Cake

Recently going through the latest Delicious Magazine (July 2015 issue) – I was not only struck by how awesome the cover was (Raspberry ripple & pistachio parfait with crumbled honeycomb) – but I was also impressed by the number of recipes that I had tagged to “make”.

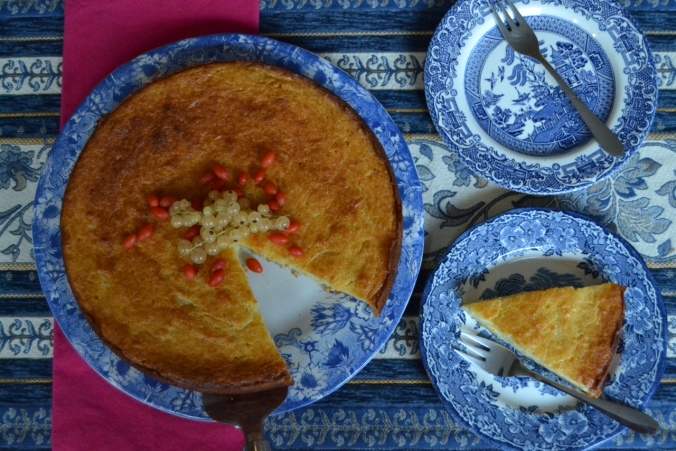
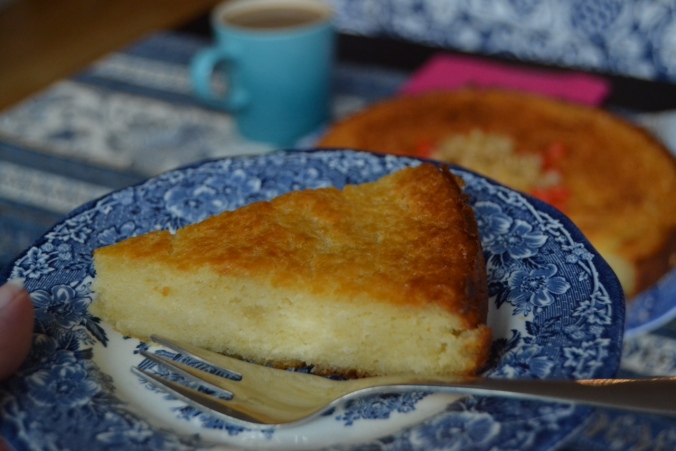
Which is why – within a day of reading – I had already whipped up their Ricotta Torte. I omitted the honey & walnut drizzle and served mine without nectarines… and although I loved it, HIM was not a fan. It wasn’t too sweet (which I loved, HIM not so much) and had the consistency of a baked cheesecake with the hint of South African Milktart (so bit like a bite of home)

ricotta cake 3

Would I make it again? Maybe… if it was for like-minded (tasting) folks like me, then yes… but if it was for HIM and other sweet toothed friends & family – then I might have to add the honey drizzle or make something else.

ricotta cake 4

Baked Orange Ricotta Cheese Cake

150g sugar
250g butter (softened)
500g ricotta
1 teaspoon of orange blossom essence
zest of 1 orange
3 eggs
150g flour
1 teaspoon baking powder

  • Cream sugar & butter until light & fluffy
  • Add eggs one at a time, beating between each addition
  • In a separate bowl, lightly whisk ricotta with orange blossom & orange zest until smooth
  • Combine ricotta mixture with butter mixture
  • Sift over the flour & baking powder and stir in gently to combine
  • Spoon into a greased cake tin
  • Bake for 60min (or until skewer test comes out clean)
  • Cook for 15min before turning out onto a wire rack to cool completely

ricotta cake 2

Coffee Cream Chocolate Swiss roll

So now that I have finally found my baking legs again and am ready & rearing to go in the kitchen… I couldn’t wait to make this gorgeous swiss roll from the Delicious Magazine (no idea what issue it was, as the recipe was just on one of the pages that I had ripped out and placed into “must try” pile)

swissroll 6

It was relatively easy to make – I say “relatively”, because rolling a swiss roll is always a bit tricky… just remember to score a line in the baked sponge before rolling and to use a clean dish towel to help the sponge roll as tightly as possible without squeezing all the filling out. Another neat trick is to roll the sponge when it is still slightly warm – without filling – so that it “takes the shape” before adding the filling!

Would I make it again? Yes… the coffee cream was a delicate but delicious flavor to the chocolate sponge and all done and dusted in an hour!

swissroll 7

Coffee Cream Chocolate Swiss Roll

6 eggs (separated)
150g caster sugar
50g cocoa
175ml double cream
35g icing sugar
1-2 Tablespoons of (cooled) strong coffee (to taste)

  • Line a flat swiss roll tin (I used a baking tray) with baking parchment
  • Beat egg yolks with the caster sugar until thick & pale
  • Sift in cocoa & fold in with a metal spoon
  • Beat egg whites in a separate dish to form soft peaks
  • swissroll 3
  • Fold egg whites into cocoa mixture (starting with a spoonful at a time)
  • swissroll 2
  • Pour onto lined baking tray
  • swissroll 4
  • Bake for 15-20min at 180 C until cooled
  • Once semi-cooked – Turn onto a cocoa sprinkled baking parchment
  • Peel off baking parchment used while baking
  • Score the sponge with a knife (3-5cm from the end) of one of the short sides
  • Using a clean dish towel & the cocoa dusted paper to roll up the sponge – starting at the scored short side
  • leave to cool
  • to make the coffee cream – beat cream, icing sugar & cooled coffee in a mixing bowl
  • Unroll the sponge & spread cream (leaving 1-2cm border)
  • Re-roll the sponge (again using the parchment paper & clean dish towel)
  • Chill for 1hr or overnight (although they do recommend taking the swiss roll out of the fridge at least 1hr before serving)

swissroll 5 swissroll 8

Asparagus Risotto

This dismal winter weather that is setting in, makes me crave comfort food!

And what better comfort food is there…than Italian!!! The cheese & carb combinations of this wonderful country make me smile 🙂 From Pizza to Pasta to Risotto (to name a few) – this cuisine choice has flavour written all over it! Taking simple (but good) ingredients and turning them into a bowl of YUM!

I re-created (& adapted) Francesco Mazzei recipe that was in the Delicious Magazine – by replacing the prosecco with white wine (it was wine from Puglia that we had bought from Olivetus – so I knew it was still QUALITY!). And I used Arborio instead of carnaroli rice.

Arborio:  is the most widely available risotto rice, typically wider & longer, & not as starchy . But the downside is that it absorbs liquid a little less well.

Carnaroli: Variously hailed as the “king” or the “caviar” of all Italian rice. It’s said to produce the creamiest risotto, yet it’s more resistant to overcooking than arborio. Normally available in specialty shops.

Would I make it again? yes…  it is full of flavour – doesn’t require a lot of work & is ready in less than 30min. It does however require your full attention during this time – as stirring and slowly ladling in stock is essential!

Asparagus Risotto

asparagus risotto 3

200g asparagus
350g Arborio Rice
1 tablespoon of olive oil
35g butter
1 small onion, finely chopped
125ml white wine
800ml-1l stock (if you use chicken stock like I did – this is obviously no longer vegetarian)
Fresh nutmeg
30g parmesan – grated
1 tablespoon fresh herbs, chopped

asparagus risotto 1

  • Trim the tips of the asparagus off & place to one side
  • finely slice the stems
  • Heat a large pan with the dry rice – until gently warm, stirring – do not let it brown
  • In a large pot, heat oil & 5g of butter – fry onion for 4-5min until soft
  • Add warm rice – stirring until translucent
  • Add white wine & boil to evaporate alcohol
  • Add stock – one ladle at a time – stirring continuously.
  • Only adding the next ladle of stock when the previous one has been absorbed
  • after 10min – add asparagus stems
  • In another pan, heat 5g butter & little olive oil & fry asparagus tips with a grating of nutmeg until tender
  • When rice is done, switch off the pot, place a lid on top & leave to rest for 5-10minutes
  • Add rest of the butter, parmesan & herbs & give one more stir
  • Serve topped with the asparagus and little bit more parmesan (because no one said no to a bit more cheese – right?)

asparagus risotto 2

Printer version

Cappuccino Cake

yes people… it was my birthday recently….

I turned 28! (again)

Ok – let’s be honest, woman don’t really like to reveal 2 things – (1) age and (2) weight… in no particular order.

What I can tell you – is that this is the last year that I would be celebrating my birthday as an unmarried woman *grin*….

I decided to make 2 cakes for the office – so this is the first one and the next post about the Orange Clementine Cake will be the second one 🙂

the question is – what kind of cakes can you make at 11pm on the night of your birthday – when you have had a glass of wine, enjoyed a yummy bowl of pasta and are really not in the mood to get into the kitchen?

Well – this recipe is from the Delicious Magazine (no idea which issue – as the page doesn’t say) and was super easy to make. (Another big plus is that one of my colleagues actually said that of all the cakes and bakes that I have made and shared at the office – this was the BEST one that he had ever tried!)

Cappuccino Cake

cappuccino cake final

100g butter, softened

50g cocoa powder (I ran out of the total quantity of cocoa powder and substituted chocolate drinking powder to make up the rest)

3 large eggs

50ml milk

175g self-raising flour

1 heaped teaspoon of baking powder

275g caster sugar

For the filling & topping: 300ml cream, 1 teaspoon of instant coffee dissolved in 2 teaspoons of boiling water (left to cool) and some icing sugar

cappuccino cake ingredients

  • Measure cocoa into large mixing bowl and add 6 Tablespoons of boiling water
  • cappuccino cake mix 1
  • Mix well to make a paste like consistency
  • Add all the remaining ingredients fo the sponge to the bowl and beat until combined
  • cappuccino cake mix 2
  • cappuccino cake mix 3
  • cappuccino cake mix 4
  • cappuccino cake mix 5
  • Mixture makes a fairly thick batter – and be careful not to over-beat
  • Divide cake mixture into 2 greased tins
  • bake for 25-30minutes at 180C
  • cappuccino cake oven
  • leave to cool and then turn out onto rack
  • to make topping and filling – beat cream until it holds its shape, then stir through the icing sugar and coffee
  • use half to sandwich the 2 cakes together and the rest can be smoothed over the top
  • cappuccino cake iced
  • Use some chocolate drinking powder dusted over the top
  • cappuccino cake final

cappuccino cake slice

Blueberry (banana) and lemon squares

I still had some blueberries left over in the freezer from Sarah (as I had only used half of the bag for the Banana & Blueberry Muffins) and since I am in *spring clean/moving* mode… I am on a mission to use up items that are in my freezer, fridge or store cupboard.

in terms of the word *spring clean* – I would like to state that the promise of spring is late… and I am now becoming concerned that if it doesn’t arrive – we will head straight back in into autumn without a word from Summer…. *sigh*…. anybody else also feel like that?

Back to discussing this recipe – after making the afore-mentioned muffins (which HIM really enjoyed)… I found this recipe in the latest Delicious Magazine (June 2013 issue) and knew that it was something that I wanted to try out.

Three points to mention

  1. I had one ripe banana that was sitting in the fridge begging to be used rather than tossed away… so I added it to the mixture before baking. This made the cake very moist but also added the little black flecks that are so very visible in Banana bread baking (not a bad thing)
  2. the blueberries sank to the bottom of the bake – not sure if this is because they were frozen berries or ? (for the record – this did not happen with the muffins that I made and those were also frozen berries). – if you know why this happened – please drop me a note and let me know!
  3. I did not make the icing for the cake as I am not a big fan of icing but if you are interested – mix 6-8 tablespoons lemon juice with 200g icing sugar and drizzle over the sponge and leave to set for 1hr

Blueberry, (banana) and lemon squares

blueberry final

250g self raising flour

1 teaspoon baking powder

225g caster sugar

4 large eggs

225g butter, softened

3 Tablespoons milk

grated zest of 3 lemons, plus a squirt of juice

250g blueberries

(1 mashed banana – my own addition)

blueberry squares

  • Place dry ingredients into a large bowl and make a well in the middle
  • Add eggs, butter, milk and lemon zest
  • Beat with electric hand mixer until smooth and combined
  • blueberry square mix 1
  • Stir in banana and blueberries (plus a squirt of lemon juice)
  • blueberry square mix 2
  • Pour batter into a greased traybake tin
  • blueberry square pre oven
  • Bake for 40-50minutes at 170C
  • (makes 24 squares)
  • blueberry square post oven

Basil, sun-dried tomato and goats cheese roulade – Bookalokal

I can’t actually describe how long I have been drooling over this recipe for… it appeared in the Delicious magazine a few months back (unfortunately the pages don’t indicate which issue it is from… and of course, they are torn out pages that I normally land up doing, so no front cover to check either… *oops* :))

“Which recipe?”, you may ask… the Basil, sun-dried tomato & Goats cheese roulade…. and what better event to make it for than for a Bookalokal dinner??? This was my 2nd hosting event for Bookalokal… so I really wanted to impress….

What do you think? Impressive enough???

Basil, sun-dried tomato & goats cheese roulade

roulade single plate

70g butter

100g plain flour, sifted

500ml milk

7 eggs

100g Parmesan

240g ricotta

120g soft goats cheese, crumbled

120g soured cream

75g sun-dried tomatoes, drained & roughly chopped

Basil leaves, chopped

75g Pesto to serve

roulade ingredients

  • melt butter in a pan over a medium to low heat
  • Add the flour and stir for 1-2minutes until smooth
  • add the milk and whisk gently until thickened
  • Add the egg yolks one at a time, beating well between each addition until combined.
  • Remove from heat and season well
  • In a clean bowl, use a hand mixer to whisk the egg whites with a pinch of salt until stiff peaks form
  • Fold one-third of the egg white mixture into the yolk mixture, then, with a metal spoon, using a figure of 8 motion, fold in the remaining egg whites
  • Spread the mixture into a greased & baking paper lined swiss roll tin
  • Sprinkle 25g Parmesan and bake for 15minutes at 200C or until roulade is golden and springs back when gently touched
  • roulade baking
  • Turn out onto a another sheet of baking paper to cool
  • roulade out the oven
  • Mix the Ricotta, goats cheese, soured cream and remaining parmesan in a bowl.
  • Season and spread mix over the roulade
  • roulade and cheese
  • Scatter with 3/4’s of tomatoes and handful of basil
  • roulade and filling
  • Using paper as a guide, roll up the roulade from the longest side, finishing seam-side down.
  • Wrap in cling film and chill for at least 4hours or overnight
  • Slice the roulade into 3-4cm thick slices

roulade sliced

roulade starters

Mucking-Afazing Cheesy Polenta Cornbread

The North Americans are well versed in cornbread recipes… but I have to admit that the South Africans have their own take on it as well… and if my memory serves me right, I remember my ex-boyfriends mom always making a dish of it when they were having their weekly spare-rib braai!

So I was excited to find a recipe in the UK Delicious Magazine (no idea which issue, as I have a new trick of ripping out pages of recipes from magazines and placing them in a pile, so if there is no issue details on the page… the information is lost on me …) and have realised that sweetcorn in bread, is now a worldwide trend!

I particularly love the way that the little kernels of corn pop in your mouth with each bite, providing a delicious sweet contrast to the cheesy bread taste!

And funnily enough – you can ask my mom…. but I wasn’t a huge fan of corn until a few years ago! And now I try to put it into everything… even salads (as HIM has now had the joy to experience!)

Cheesy Polenta Cornbread

cheesy polenta cornbread baked

150g plain flour

2 teaspoons baking powder

½ teaspoon bicarbonate of soda

1 Tablespoon caster sugar

1 teaspoon salt

125g dried polenta

1 teaspoon of chilli flakes (I used the Ina Paarman garlic and chilli flakes that mom gave me for Christmas)

75g cheddar cheese, grated

2 eggs, beaten

300ml Milk

150g corn (drained)

cheesy polenta cornbread

  1. Sift Flour, baking powder, bicarbonate of soda, sugar and salt together into a large bowl
  2. Stir in the polenta, chilli flakes and grated cheese
  3. cheesy polenta cornbread dry ingredients
  4. Make a well in the centre and add the beaten eggs and milk.
  5. Mix together well, then stir in the sweetcorn
  6. Pour mixture into a greased baking tin
  7. Bake for 35-45minutes at 200C (cover with a loose piece of foil after 30min if bread is browning too quickly)
  8. cheesy polenta cornbread sliced

Pastel de Nata – Portuguese Custard Tart for HIM

HIM is Portuguese… and has the worlds sweetest tooth!!

And there is one Portuguese pastry that he adores more than any other… and this is the infamous Pastel de Nata!! (plural is pastéis de Nata)

According to the world of Wikipedia – This Portuguese egg tart pastry has been around since the before the 1800’s and is said to have been created by Catholic monks at the Jeronimos Monastery in Lisbon. In medieval history – the convents and monasteries of Portugal produced large quantities of eggs, whose egg-whites were in demand for starching of clothes – so it was quite common for monasteries and convents to produce confections with the leftover egg yolks.

So I decided that in order to show how much HIM means to me… I would attempt to make him a batch!

Pastéis de Nata

500ml milk

1 vanilla pod – split and seeds scrapped

6 medium egg yolks

120g caster sugar

50g plain flour

500g puff pastry

ground cinnamon

making the custard

  1. Put the milk in a heavy-based saucepan and add split vanilla pod and scrapped seeds.
  2. Put yolks and sugar into a bowl and whisk until pale and creamy.
  3. Add the flour and mix until smooth.
  4. Put the pan of milk over a medium heat, bring almost to the boil, then slowly pour half into the egg mixture whisking well.
  5. Add the rest of the milk and whisk again
  6. Pour the mixture back into the pot and bring tot he boil – whisk non-stop for 1minute until thickened.
  7. Take off the heat
  8. Pour into a clean bowl and remove vanilla pods
  9. Cover the surface with baking powder straightaway to stop a skin forming.
  10. Lightly grease 12-hole muffin fan
  11. Dust work surface with plenty of icing sugar
  12. Take pastry from fridge and roll out to 3mm sprinkling with more icing sugar.
  13. Cut 12 pastry discs about 10cm in diameter.
  14. Place in the muffin tray and place in the fridge for 1hour
  15. Remove tray from fridge and spoon in the créme pátissiére (custard) and sprinkle with cinnamon
  16. Bake for 15min until the top is golden
  17. remove from the tin before they have cooled thoroughly – otherwise the caramelized sugar will make them stick!

His verdict? That they were very good for my first try 🙂

Delicious Magazine July issue…